
Reduce Image Size to 20KB Online
Instantly shrink heavy mobile camera photos and scans to under 20KB with real-time before and after savings. Perfect for Indian competitive exams and portal submissions.
How to Reduce Image Size to 20KB
Quick, professional in-browser workflow engineered for instant compliance.
Drop Heavy Image File
Upload camera photos, scanned certificates, or signatures up to 25MB without pre-compression.
Precision Byte Trimming
The engine removes bloated metadata headers and optimizes color channels to stay strictly under 20KB.
Direct In-Memory Execution
No files leave your computer or smartphone. All data handling happens in local device memory.
One-Click Download
Verify the reduction percentage and exact byte weight, then download your compliant file immediately.
Why Use This Reduce Image Size to 20KB Tool
Engineered specifically to solve strict upload constraints across public and private portals.
Multi-Megabyte Mobile Camera Photos
Shrinks 5MB–15MB smartphone photos down to strictly under 20KB without creating blurred facial features.
Recruitment & Job Portals
Guarantees acceptance on SSC, UPSC, RRB, and state PSC job application portals enforcing strict 20KB limits.
Admissions & Entrance Tests
Fulfills requirements for NEET, JEE Main, CUET, and university registration portals effortlessly.
Scanned Certificates & Marksheets
Trims high-resolution scanner outputs to lightweight 20KB attachments for identity verification.
Supported Format Matrix
How different image formats are handled and optimized to 20KB.
| Input Format | Status | Output File | Visual Quality | Portal Compatibility |
|---|---|---|---|---|
| JPG / JPEG | Optimal | Compliant 20KB JPG | High (DCT Quantization) | Universal (100% Accepted Across Portals) |
| PNG | Supported | Quantized PNG / 20KB JPG | High Contrast for Line Art | Signatures & Graphic Badges |
| WebP | Supported | Optimized 20KB WebP | Advanced Wavelet Compression | Modern Portals & Web Uploads |
| HEIC / HEIF (iPhone) | Auto-Convert | Direct 20KB JPG | Normalized Color Space | Ready for All Indian Portals |
Before & After Comparison
Real-world reduction metrics preserving clarity while meeting 20KB constraints.
Engine Performance Specifications
Detailed technical capabilities of our in-browser optimization pipeline.
| Specification Metric | Engine Capability |
|---|---|
| Reduction Method | Chroma Subsampling + Iterative DCT Quantization |
| Target Ceiling | Strict hard limit under 20.0 KB (20,480 bytes) |
| Metadata Handling | EXIF, GPS, camera manufacturer data stripped for maximum space savings |
| Client Privacy | 100% In-Browser execution (Zero server uploads, zero logs) |
| Execution Latency | < 50ms average on modern mobile & desktop hardware |
| Supported Platforms | Android, iOS (iPhone/iPad), Windows, macOS, Linux, ChromeOS |
Free Image Compressor to 20kb for Quick Optimization
Are you struggling with slow website speeds? Large files often drag down your performance, frustrating visitors and hurting your search rankings. Using a reliable free image compressor can help you regain control over your site speed effortlessly.
Our tool provides a simple way to shrink your visuals down to a 20kb target. This specific size is perfect for maintaining fast loading times on blogs, online stores, and social media platforms. Speed is essential for keeping your audience engaged in today's fast-paced digital world.
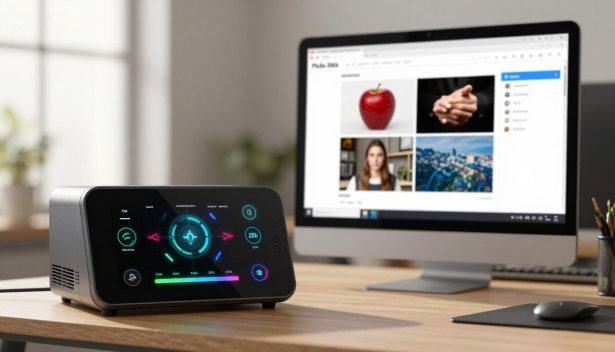
To achieve the best results with a 20kb image compressor, you may need to tweak your settings. Adjusting dimensions, file formats, and quality levels ensures your content remains sharp and readable. By using an image compressor to 20kb, you balance high visual quality with the efficiency needed for modern web standards.
Key Takeaways
- Smaller file sizes significantly improve website loading speeds.
- Optimized visuals enhance user experience across all devices.
- Adjusting quality and dimensions helps maintain clarity at small sizes.
- Fast-loading pages are crucial for better search engine rankings.
- Our tool makes professional optimization accessible for everyone.
Why Compress Images to 20KB?
Every kilobyte counts when you want to build a high-performing website. When you compress image to 20kb, you are essentially trimming the digital fat that slows down your user experience. While a single image might seem small, the cumulative weight of dozens of photos can cripple your site's performance.
How Smaller Images Improve Page Speed
When a visitor lands on your site, their browser must download every asset before the page becomes fully interactive. By choosing to reduce image size, you directly lower the total data transfer required for that initial load. This reduction allows the browser to render content much faster, leading to a snappier website page speed.
It is important to remember that image optimization is just one piece of the puzzle. Your overall website page speed also depends on your hosting quality, the number of scripts running, and how you load your fonts. However, images are often the heaviest elements, making them the best place to start your optimization journey.
Benefits for Websites, Blogs, and Online Stores
Whether you run a personal blog or a large shop, speed is a critical factor for success. A faster site keeps visitors engaged and reduces bounce rates significantly. For those managing an Indian ecommerce platform, keeping images light ensures that customers can browse your product catalog without waiting for heavy files to load.
When you reduce image size, you also save on bandwidth costs for your hosting plan. This is a massive advantage for growing businesses that need to scale efficiently. Consistency is key, so ensuring every graphic is optimized helps maintain a professional look across your entire digital presence.
Why Fast Loading Matters for Indian Audiences
In India, the digital landscape is dominated by mobile users who often rely on varying network speeds. Many users access the internet through mobile data, where high-latency connections are common. If your site is bloated with unoptimized images, these users will likely leave before your content even appears.
Optimizing for Indian ecommerce means prioritizing accessibility and speed above all else. When you compress image to 20kb, you ensure that your store remains functional even on slower 3G or 4G networks. Providing a seamless experience is the best way to build trust and encourage repeat visits from your audience.
How an Image Compressor to 20kb Works
Ever wonder how a large photo shrinks down to just 20KB without disappearing entirely? When you use image compression online, the tool performs a series of complex mathematical operations to strip away redundant data. This process ensures your website loads quickly for users across India while keeping your visuals sharp.
Image Resizing and Pixel Reduction
The first step in this process is often image resizing. By reducing the total number of pixels in an image, the tool significantly lowers the file size before any other compression occurs.
Think of it like folding a large map into a smaller pocket size. You keep the essential details, but you remove the extra space that isn't needed for a standard screen view.
Lossy and Lossless Compression Methods
There are two primary ways to shrink your files, and each serves a different purpose. Understanding these methods helps you choose the right settings for your specific needs:
- Lossy compression: This method permanently removes some visual information that the human eye might not notice. It is highly effective for reaching very small file sizes like 20KB.
- Lossless compression: This technique reduces file size without losing any original data. It is perfect for images where every single pixel must remain perfect, though it results in larger files than lossy methods.
How Compression Balances Quality and File Size
Finding the "sweet spot" is the main goal of any good compression tool. The software analyzes the image to determine which parts can be simplified without ruining the overall look.
It re-encodes the file using efficient algorithms that prioritize smaller storage requirements. This balance allows you to maintain a professional appearance while meeting strict performance targets.
What Happens When an Image Is Compressed Too Aggressively
Sometimes, pushing a file toward a 20KB limit can lead to a noticeable drop in image quality. If the compression is too heavy, you might see several common issues:
- Blurriness: Fine details become soft and lose their crisp edges.
- Blockiness: You may notice square artifacts appearing in areas with smooth gradients.
- Color shifts: The original vibrant colors might look dull or slightly altered.
Always check your results to ensure the final image still looks great on your website or social media feed.
Choosing the Right Image Format Before Compression
Not all image formats are created equal when you need to hit a strict 20KB limit. Selecting the correct file type is the first step toward achieving high-quality results without sacrificing performance. By matching the format to your specific content, you make it much easier to compress jpg to 20kb or manage other file types effectively.
When to Use JPEG for Photographs
JPEG is the industry standard for complex, colorful images like photographs. It uses lossy compression to discard data that the human eye barely notices, which helps keep file sizes small. If you are working with high-resolution camera shots, this format is your best choice for maintaining a balance between detail and size.
When PNG Is Better for Graphics and Transparency
PNG files are ideal for images that require sharp edges, such as logos, icons, or text-heavy graphics. Unlike JPEG, this format supports transparency, which is vital for web design elements that need to blend into different backgrounds. While it is often harder to compress png to 20kb due to its lossless nature, it remains the superior choice for maintaining crisp lines.
How WebP and AVIF Reduce File Sizes Further
Modern web standards have introduced newer formats that offer better efficiency than traditional options. WebP image compression provides a fantastic way to maintain high visual quality while significantly lowering the byte count. Similarly, AVIF image optimization is gaining popularity for its ability to deliver even smaller files, making it a powerful tool for developers looking to speed up their sites.
Format Recommendations for Websites and Social Media
Choosing the right format depends on where your image will live. For general web pages, WebP is often the best choice, while social media platforms usually prefer standard JPEG or PNG files. Always verify that your chosen platform supports these modern formats before uploading your final assets.
| Format | Best Use Case | Transparency | Efficiency |
|---|---|---|---|
| JPEG | Photographs | No | High |
| PNG | Logos/Graphics | Yes | Low |
| WebP | Web Content | Yes | Very High |
| AVIF | Modern Browsers | Yes | Excellent |
Preparing Photos for a 20KB Target
Achieving a 20KB file size starts with smart preparation rather than just aggressive compression. By taking a few simple steps before you start, you can reduce image size significantly without sacrificing the visual integrity of your work. This approach ensures your website remains fast for users across India while maintaining high visual standards.
Checking Image Dimensions and Resolution
Many users make the mistake of uploading massive, high-resolution photos directly to their sites. Image resizing is often more effective than simply lowering the quality settings of a tool. If your image is 4000 pixels wide but only displayed at 600 pixels, you are wasting valuable data. Always scale your images down to the actual display size required by your layout.
Cropping Unnecessary Background Areas
Sometimes, a photo contains a lot of empty space that adds to the file weight without providing value. By cropping out unnecessary backgrounds, you can focus the viewer's attention on the main subject. This simple edit helps you reach your 20KB goal much faster while keeping the important details sharp and clear.
Removing Metadata Without Affecting the Main Image
Digital photos often carry hidden data, such as camera settings, GPS location, and timestamps. This metadata is rarely needed for web display and can add extra bytes to your file. Stripping this information is a safe way to reduce image size without changing how the image looks to your visitors.
Why the Original File Should Be Kept as a Backup
While a 20KB file is perfect for web performance, it is usually not suitable for other tasks. You should always keep a high-quality original file stored safely on your computer or cloud drive. You might need that version later for printing, professional editing, or future high-resolution displays.
| Optimization Step | Primary Benefit | Impact on File Size |
|---|---|---|
| Image Resizing | Matches display area | High Reduction |
| Cropping | Removes dead space | Medium Reduction |
| Metadata Removal | Cleans file structure | Low Reduction |
Using a Free Image Compressor to Reach 20KB
Achieving a 20KB file size is a simple process when you follow the right steps. Using a high-quality image compressor to 20kb allows you to maintain visual clarity while significantly reducing load times for your visitors.
Upload the Image to the Compression Tool
Start by selecting a reliable free image compressor from your browser. Most platforms feature a simple drag-and-drop interface that makes the process quick and intuitive.
Simply click the upload button or drag your file directly into the designated area. Once the file is uploaded, the tool will automatically analyze the current size and prepare it for the next stage of optimization.
Set the Maximum File Size to 20KB
To compress image to 20kb effectively, look for the settings menu within the tool. Many advanced compressors allow you to input a specific target size manually.
Enter "20" into the target size field to ensure the software prioritizes this limit. This setting acts as a constraint, forcing the algorithm to find the best balance between file weight and image detail.
Adjust Quality and Dimensions When Needed
Sometimes, a single pass might not reach your target without losing too much detail. If the result looks blurry, you may need to adjust the pixel dimensions first.
Reducing the width and height of your image often makes it much easier to hit the 20KB goal. You can also tweak the quality slider to find the sweet spot where the file remains sharp but stays under your limit.
How to Download and Rename the Compressed File
Once you are satisfied with the preview, click the download button to save the file to your device. It is a good practice to compress jpg to 20kb and then rename the file immediately.
Use descriptive, lowercase names with hyphens instead of spaces to improve your SEO. For example, rename your file to "product-name-optimized.jpg" so it is easy to identify and ready for your website upload.
Optimizing Different Image Types for Quick Results
Achieving a 20KB limit is not a one-size-fits-all process for every image on your website. Different visual assets require unique strategies to maintain clarity while meeting strict performance goals. By adjusting your approach based on the content, you ensure that your site remains fast without sacrificing the user experience.
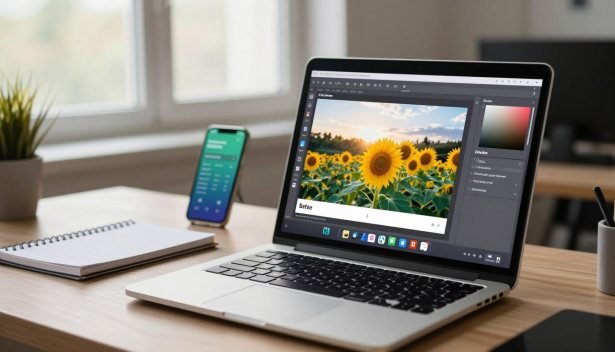
Compressing Product Photos for Online Shops
When you manage ecommerce product images, the primary goal is to showcase details clearly. Shoppers need to see textures and colors to make informed buying decisions. You should prioritize high-quality source files before applying compression to ensure the final result remains sharp.
Reducing Blog Featured Images and Article Graphics
Blog graphics often contain a mix of photography and design elements. To compress png to 20kb effectively, you might need to reduce the dimensions first. This helps keep the file size low while ensuring the image looks crisp on both mobile and desktop screens.
Preparing Profile Pictures and Social Media Posts
Managing the correct social media image size is vital for maintaining a professional appearance. Platforms like Instagram or LinkedIn have specific dimension requirements that can conflict with a 20KB target. You must balance these platform rules with your compression settings to avoid pixelation.
Optimizing Scanned Documents and Simple Illustrations
Scanned documents and simple illustrations often contain large areas of flat color. These files are perfect candidates for aggressive compression because they lack complex gradients. You can often achieve significant size reductions without losing any readability.
Why Text-Heavy Images Need Extra Quality Checking
Text-heavy images require careful inspection because aggressive compression can make small letters, lines, and labels difficult to read. If your graphic includes important instructions or pricing, always perform a visual check after processing. Never assume the text remains legible without verifying the output at full scale.
| Image Type | Primary Goal | Compression Strategy |
|---|---|---|
| Product Photos | Clarity & Detail | Moderate reduction |
| Blog Graphics | Visual Appeal | Dimension resizing |
| Social Media | Platform Fit | Strict dimension control |
| Documents | Readability | High compression |
How to Preserve Visual Quality at 20KB
Achieving a perfect balance between file size and visual clarity is an art form. While a 20kb image compressor is a powerful tool, you should never blindly accept the first result it produces. Taking a few extra moments to fine-tune your settings ensures your content remains crisp and professional for your audience.
Finding the Best Quality Setting
Most tools allow you to adjust a quality slider before you finalize the download. Instead of choosing the lowest setting immediately, try starting at 80% and working your way down. This iterative process helps you find the "sweet spot" where the file size drops significantly without ruining the image quality.
Comparing the Original and Compressed Versions
Always perform a side-by-side comparison before saving your final file. Open your original image and the compressed version in two separate tabs or windows. Zoom in to 100% to inspect fine details like text, skin tones, and product edges. If the compressed version looks noticeably different, you may need to adjust your compression parameters.
Recognizing Blur, Banding, and Compression Artifacts
Keep a sharp eye out for common signs of over-compression. Blurriness often appears in areas with fine textures, while banding can ruin smooth gradients in the sky or background. Compression artifacts, which look like small blocks or "noise," are a clear sign that the 20kb image compressor has pushed the file too far.
| Quality Level | Visual Impact | File Size | Best Use Case |
|---|---|---|---|
| High (90%) | Excellent | Large | Hero Banners |
| Medium (70%) | Good | Moderate | Blog Posts |
| Low (50%) | Noticeable Loss | Small | Thumbnails |
When a Larger File Is Better Than a Poor-Quality Image
Sometimes, a strict 20KB limit is simply not enough to maintain high image quality for complex photos. If your image contains intricate details or vibrant colors, a slightly larger file size is often the better choice. Remember that your visitors value a clear, attractive image more than saving a few extra kilobytes of bandwidth.
Checking Image Size, Dimensions, and Format After Compression
Achieving the perfect compressed image file size is only half the battle; the next step is a thorough quality check. While automated tools provide estimates, you should always verify the final output manually to ensure your website remains fast and professional.
Confirming the File Is Actually Below 20KB
Never rely solely on the progress bar of an online tool. Sometimes, the final file might slightly exceed your target due to metadata or encoding variations. Always check the file properties directly on your computer to confirm the actual size is under your 20KB limit.
Verifying Width, Height, and Aspect Ratio
Compression can sometimes alter the dimensions of your image if you have enabled auto-resizing features. Check that the width and height match your design requirements to avoid blurry or stretched visuals. A consistent aspect ratio is essential for maintaining a clean layout across your entire site.
Testing the File on Phones and Desktop Screens
Your images must look sharp on both high-resolution desktop monitors and smaller mobile screens. Open the file on your smartphone to see if the text or details remain legible. If the image appears pixelated, you may need to adjust your compression settings slightly.
Useful Checks on Android, Windows, and macOS
Each operating system offers built-in ways to inspect your files without extra software. On Windows, right-click the file and select "Properties" to view the size. On macOS, use "Get Info" by pressing Command + I. Android users can check file details directly within their "Gallery" or "Files" app.
| Platform | Action | Key Metric |
|---|---|---|
| Windows | Right-click > Properties | Size on disk |
| macOS | Command + I | Dimensions & Size |
| Android | Details/Info menu | File format & KB |
Using 20KB Images for Website SEO and Performance
Optimizing images is a critical step in mastering your site's overall performance and search engine visibility. While reaching a 20KB target is a fantastic goal, it is only one piece of the larger image SEO puzzle. By combining small file sizes with smart technical practices, you can significantly improve your user experience.

Writing Descriptive File Names and Alt Text
Search engines cannot "see" images the way humans do, so they rely on text to understand your content. Always use descriptive file names that include relevant keywords instead of generic labels like "IMG_001.jpg."
Furthermore, providing accurate alt text is essential for accessibility and search engine indexing. This practice ensures that screen readers can describe your images to visually impaired users while helping search bots categorize your media correctly.
Adding Responsive Image Sizes
Delivering the same large image to every device is a common mistake that hurts your website page speed. You should implement responsive images to ensure that mobile users receive smaller files than desktop users.
Modern formats like WebP image compression and AVIF image optimization allow you to maintain high visual quality at much smaller sizes. These formats are highly efficient and are now supported by almost all modern web browsers.
Connecting Image Compression With Core Web Vitals
Large, unoptimized images are often the primary cause of poor Core Web Vitals scores, specifically regarding Largest Contentful Paint (LCP). By keeping your files under 20KB, you directly contribute to faster loading times and a smoother browsing experience.
When your images load quickly, your site feels more responsive to the user. This positive interaction is a key signal that search engines use to rank your pages higher in search results.
Why Compression Alone Does Not Guarantee a Fast Website
It is important to remember that image weight is only one factor in the broader performance landscape. Even with perfectly compressed images, your website page speed can still suffer due to heavy scripts, slow server response times, or unoptimized CSS.
Achieving high Core Web Vitals requires a holistic approach that includes caching, efficient hosting, and clean code. Think of image compression as a vital foundation, but ensure you are also monitoring your entire technical infrastructure for the best results.
Compressing Images for Blogs, Ecommerce, and Social Media
Optimizing your visual content for the Indian market involves understanding both technical constraints and platform-specific needs. While a 20KB target is helpful for speed, it is not a universal solution for every digital channel. You must consider how your audience interacts with your content to ensure the best possible experience.
Image Requirements for WordPress and Other Websites
Effective WordPress image optimization relies on more than just file size. Using plugins to automate compression and implementing lazy loading can significantly improve your site's performance. Always prioritize clarity for your featured images while keeping background assets as light as possible.
Practical Size Tips for Indian Ecommerce Sellers
For Indian ecommerce, the majority of your customers will likely browse via mobile devices on varying network speeds. You should focus on ecommerce product images that remain sharp enough to show details without causing long loading delays. Balancing high-resolution visuals with efficient compression is the key to maintaining trust and reducing bounce rates.
Balancing Platform Requirements on Instagram, Facebook, and WhatsApp
Every social network has its own rules regarding social media image size and compression algorithms. Facebook and Instagram often re-compress uploads, which can lead to quality loss if your original file is already too small. It is often better to upload a slightly larger, high-quality file that the platform can process efficiently.
Handling Images That Need Specific Dimensions Instead of a 20KB Limit
Sometimes, the aspect ratio and pixel dimensions are far more important than hitting a specific file size. If your platform requires a square or landscape format, cropping your image correctly is essential to avoid awkward stretching. Do not sacrifice the visual integrity of your brand just to meet an arbitrary 20KB limit.
| Platform | Primary Focus | Recommended Strategy |
|---|---|---|
| WordPress | Page Speed | Use WebP and Lazy Loading |
| Ecommerce | Product Detail | High Clarity, Medium Size |
| Visual Impact | High Resolution, 4:5 Ratio | |
| Fast Sharing | Small Size, High Compression |
Privacy and Security When Compressing Online Images
Protecting your digital privacy is just as important as optimizing your website for speed. When you use image compression online, your files are typically sent to a third-party server for processing. It is essential to understand how these services manage your data before you hit the upload button.
Understanding How Online Uploads May Be Handled
Most web-based tools process your images on their own servers. While many reputable platforms automatically delete files after a few hours, others might store them for longer periods to improve their services. Always take a moment to review the privacy policy of any tool you choose to use.
Look for clear statements regarding data retention and whether your images are shared with third parties. If a website does not provide a transparent policy, it is often safer to look for a different service. Transparency is the hallmark of a trustworthy tool in the digital space.
Protecting Identity Documents and Personal Photos
You should exercise extreme caution when handling sensitive files. Never upload scans of identity documents, private family photos, or confidential business contracts to public websites. Even with high-quality privacy image compression standards, the risk of data exposure remains a concern for sensitive information.
If a file contains personal details like your Aadhar card number, bank statements, or private addresses, keep it off the cloud. Your personal security should always come first, even when you are in a hurry to optimize your website graphics.
When Offline Compression Is the Safer Choice
For highly sensitive material, offline software is the best solution. By using a local application on your own computer, you ensure that your files never leave your device. This approach provides you with complete control over your data without relying on an external server.
Offline tools are excellent for maintaining privacy image compression while still achieving professional results. If you are dealing with proprietary business data, sticking to local software is a smart, secure practice. It eliminates the risks associated with image compression online and keeps your most important files safe on your own hardware.
Common Image Compression Mistakes to Avoid
Many users inadvertently damage their photos by repeating simple mistakes during the compression process. While the goal is to achieve a small compressed image file size, the path to success requires careful attention to detail. Avoiding these common pitfalls will help you maintain high visual standards across your digital platforms.
Compressing an Already Compressed Image Repeatedly
A frequent error involves running the same file through a compressor multiple times. Each time you re-save a file, you introduce new compression artifacts that degrade the visual clarity. This process, often called generation loss, can quickly turn a crisp photograph into a blurry, pixelated mess.
Ignoring Image Dimensions While Chasing a Smaller File
Some users focus entirely on the file size while forgetting that dimensions play a massive role in performance. If you have a massive 4000-pixel wide image, trying to force it down to 20KB will result in severe quality loss. It is always better to resize the image dimensions first before applying heavy compression.
Using PNG for Every Type of Photo
While PNG is excellent for logos and graphics with transparency, it is often the wrong choice for complex photographs. Because PNG files are lossless, they struggle to reach a low compressed image file size without ballooning in weight. For standard photos, JPEG or WebP formats are almost always more efficient.
Replacing the Original Before Checking the Result
Never delete your source file until you have verified the output. Once you overwrite your original high-resolution image, you cannot recover the lost data. Always save your optimized versions as separate files to ensure you have a backup if the quality is not up to your standards.
"Quality is never an accident; it is always the result of high intention, sincere effort, intelligent direction and skillful execution."
Why a 20KB Limit May Not Suit Every Design
While a 20KB limit is fantastic for simple icons or thumbnails, it is not a universal solution. Large product views, detailed hero banners, and high-resolution print graphics often require more data to look professional. If you force these complex designs into such a small footprint, you will likely encounter the following issues:
- Loss of fine detail in textures and patterns.
- Visible banding in gradients and sky backgrounds.
- Reduced accessibility for users who need clear, high-contrast visuals.
Conclusion
Achieving a fast website starts with smart file management. Using a reliable image compressor to 20kb allows you to maintain a professional online presence without sacrificing speed. Your visitors appreciate quick loading times on mobile devices and desktop screens alike.
Prioritize high image quality by selecting the correct file format before you begin the reduction process. Always verify your final output to ensure the visual details remain sharp and clear. This simple habit keeps your content looking great while meeting strict performance standards.
Effective image SEO relies on this balance between small file sizes and visual clarity. Whether you manage a WordPress blog or an ecommerce store, these optimized files help your pages rank better in search results. Protect your sensitive data by choosing secure tools for your compression needs.
Start applying these techniques to your media library today. You will notice a significant improvement in how your audience interacts with your site. Consistent optimization creates a smoother experience for every user who visits your digital space.