
Resize Image to 200KB Online Free
Scale dimensions and reduce file size of scanned marksheets, certificates, and ID documents to 200KB or less directly in your browser.
How to Resize Image to 200KB
Quick, professional in-browser workflow engineered for instant compliance.
Select Document or Photo
Upload your marksheet, degree certificate, or identity scan from your device.
Adaptive Pixel & Byte Scaling
The tool optimizes resolution and compression quality to meet the 200.0 KB ceiling.
Client-Side Canvas Processing
All resizing occurs instantly in your browser memory without server uploads.
Preview & Download Instantly
Verify clear text and correct kilobyte weight before uploading to your examination portal.
Why Use This Resize Image to 200KB Tool
Engineered specifically to solve strict upload constraints across public and private portals.
UPSC & State PSC Documents
Scale educational certificates and domicile papers to satisfy the 200KB cap on recruitment forms.
College & University Admissions
Resize 10th and 12th board marksheets for seamless upload to NTA, CUET, and university systems.
Government Job Portal KYC
Comply with 200KB scanned proof requirements across central and state recruitment portals.
Passport & Visa Documentation
Provide clear, compact scans of supporting credentials within international visa system limits.
Supported Format Matrix
How different image formats are handled and optimized to 200KB.
| Input Format | Status | Output File | Visual Quality | Portal Compatibility |
|---|---|---|---|---|
| JPG / JPEG | Optimal | Standard 200KB JPG | High Text & Stamp Contrast | Universal (100% Accepted) |
| PNG | Supported | Optimized 200KB JPG | Sharp Document Lines | All Examination Portals |
| WebP | Supported | Lightweight 200KB WebP | Modern Compression | Web Submissions |
| HEIC / iPhone Photo | Auto-Convert | Compliant 200KB JPG | Standard Color Space | Direct Portal Upload |
Before & After Comparison
Real-world reduction metrics preserving clarity while meeting 200KB constraints.
Engine Performance Specifications
Detailed technical capabilities of our in-browser optimization pipeline.
| Specification Metric | Engine Capability |
|---|---|
| Target File Limit | Strict hard ceiling under 200.0 KB (204,800 bytes) |
| Dimension Scaling | Proportional aspect-ratio-safe resolution optimization |
| Privacy Guarantee | 100% In-Browser Local Execution (Zero server uploads) |
| Processing Latency | < 45 milliseconds on standard devices |
| Operating Systems | Android, iOS, Windows, macOS, Linux, ChromeOS |
Best ways to resize image to 200kb for free online
Many government portals and job application sites in India require digital files under a specific size limit. Learning how to resize image to 200kb is a vital skill for anyone handling identity submissions or profile uploads.
You can achieve this goal by adjusting pixel dimensions or lowering compression quality. These two methods ensure your files remain clear while meeting strict web requirements.
Using a reliable free online image resizer makes the process quick and simple. This guide explores the best tools available, offers advice on file formats, and provides tips for maintaining visual clarity.
We will also cover essential verification steps and privacy guidance to keep your data safe. Follow along to master these techniques for your next digital application.
Key Takeaways
- Understand why many Indian web forms enforce a 200KB limit.
- Learn the difference between changing dimensions and adjusting compression.
- Discover top-rated tools for quick file adjustments.
- Get expert tips on maintaining high visual quality after processing.
- Follow safety guidelines to protect your personal information online.
Why Resize an Image to 200KB?
Have you ever wondered why so many websites demand a 200kb image size for your uploads? Whether you are applying for a passport, a university seat, or a job, digital portals often enforce strict constraints on the files you submit. These rules exist to ensure that their servers remain fast and responsive for every user.
Common upload limits for forms and applications
Most online systems are designed to handle thousands of concurrent users. If every applicant uploaded high-resolution photos directly from a modern smartphone, the server would quickly become overwhelmed. By limiting file sizes, organizations ensure that their databases do not fill up with unnecessarily large data, which keeps the application process smooth for everyone.
It is important to remember that a file advertised as 200KB might need to be slightly smaller to pass automated checks. Some systems calculate size using exact bytes, meaning a file that is exactly 200.01KB might be rejected. Aiming for a slightly lower target helps you avoid frustrating upload errors.
Why 200KB is often a practical target
The 200KB limit is a sweet spot for many developers. It is large enough to maintain decent visual clarity for documents and profile pictures, yet small enough to save significant bandwidth. When you use a reliable image compressor, you can easily shrink a multi-megabyte photo into this manageable range without losing essential details.
This limit also helps users with slower internet connections. By forcing smaller file sizes, websites ensure that even people in areas with limited connectivity can successfully submit their forms. It is a practical standard that balances modern quality needs with technical efficiency.
Balancing file size, dimensions, and image quality
To successfully compress image to 200kb, you must understand the relationship between dimensions, format, and quality. Simply lowering the quality setting often leads to blurry text or pixelated faces. Instead, you should first consider reducing the physical dimensions of the image, such as changing a 4000-pixel wide photo to a 1000-pixel wide version.
The following table illustrates how these factors interact to influence the final file size:
| Attribute | High Quality | Optimized for 200KB |
|---|---|---|
| Dimensions | 4000 x 3000 px | 1000 x 750 px |
| File Format | PNG (Lossless) | JPEG (Compressed) |
| Visual Clarity | Excellent | Good/Readable |
| Storage Impact | Heavy | Light |
The best result is always the smallest file that remains perfectly readable. By adjusting dimensions before applying heavy compression, you preserve the integrity of the image. This approach ensures your documents look professional while meeting all technical requirements.
What to Check Before You Resize an Image to 200KB
Preparing your images for a 200KB limit requires a bit of detective work before you open any editing software. Taking these small steps early on will help you reduce image size effectively without sacrificing the quality of your visual content.
Find the image’s current file size and dimensions
Start by right-clicking your file and selecting "Properties" or "Get Info" to see the technical details. You need to know the current image file size and the specific image dimensions in pixels. If your photo measures thousands of pixels on its longest side, you will likely need to shrink those dimensions before compression can reach your target.
Identify whether the file is JPEG, PNG, WebP, or another format
Different file types handle data in unique ways. A PNG file is often larger because it supports transparency, while a JPEG is usually better for standard photographs. Knowing your file format is essential because some tools handle specific extensions better than others during the conversion process.
Confirm the website’s exact file-size and format requirements
Always check the specific upload requirements provided by the platform you are using. Even if you manage to get your file under 200KB, the website might reject it if it does not accept your chosen format. Always verify if the system prefers JPEG, PNG, or perhaps the more modern WebP format.
Create a backup before editing the original image
It is a smart practice to create a duplicate of your file before you start making changes. This ensures that your original, high-resolution image remains safe for future use. Never overwrite your only copy, as you might need that extra detail later for printing or other high-quality projects.
How to Resize Image to 200KB with Squoosh
Achieving the perfect balance between file size and visual clarity is simple when you use Squoosh to resize image to 200kb. This powerful, browser-based tool allows you to process your photos locally without uploading them to a server, ensuring your data remains private. It is an excellent choice for anyone looking to optimize images for web forms or professional applications.
Upload the image to Squoosh
To get started, simply navigate to the official website and drag your file directly into the browser window. You can also click the select button to browse your local folders. Once uploaded, the tool immediately displays your image alongside a real-time interface for adjustments.
Choose JPEG, WebP, or MozJPEG compression
Squoosh supports several advanced encoders that help you maintain image quality while shrinking the file size. You can select from standard JPEG, the highly efficient MozJPEG, or the modern WebP format. Choosing the right encoder is the first step to successfully resize image to 200kb.
| Format | Best For | Compression Efficiency |
|---|---|---|
| JPEG | General compatibility | Moderate |
| MozJPEG | High-quality web photos | High |
| WebP | Modern web browsers | Very High |
Adjust quality and image dimensions
Start by reducing the pixel dimensions if your original file is very large. After resizing the dimensions, use the quality slider to lower the file size incrementally. Always watch the fine details, such as text, faces, and sharp edges, to ensure the image remains clear.
"Optimization is not just about shrinking files; it is about preserving the essence of the visual story while meeting technical constraints."
Compare the preview with the original image
The interface provides a handy slider that lets you compare the original version with your compressed output. This feature is vital for maintaining image quality during the editing process. If you notice artifacts or blurriness, simply adjust the quality slider back up until the image looks crisp again.
Download and verify the final file size
Once you are satisfied with the preview, click the download button to save the file to your device. Do not rely solely on the tool's estimate; always check the file properties in your folder to confirm it is under the 200KB limit. This final verification step ensures your file is ready for any upload requirement.
How to Compress an Image to 200KB with TinyPNG
If you need to compress an image to 200kb, TinyPNG offers a seamless automated solution. This platform is widely recognized for its ability to maintain high visual quality while significantly reducing file weight. It is a fantastic choice for anyone preparing files for online forms or professional portfolios.
Upload JPEG, PNG, or WebP files to TinyPNG
Getting started is straightforward. Simply drag and drop your files directly into the browser window on the TinyPNG website. The tool supports standard formats, allowing you to compress PNG, JPEG, and WebP files with ease.
Let the tool reduce file size automatically
Once you upload your images, the service begins its work immediately. It uses smart lossy compression techniques to strip away unnecessary metadata and color data. This process happens in the background, ensuring you do not have to adjust complex settings manually.
Download the compressed image and check its properties
After the progress bar finishes, you can download your optimized files individually or as a ZIP archive. Always remember to check the file properties on your computer to confirm the final size. Verifying the result ensures your file meets the specific requirements of your destination website.
Use resizing options when compression alone is not enough
Sometimes, the initial compression might not be sufficient to hit your target. If your file remains too large, you should consider reducing the pixel dimensions. Many users find that combining a smaller resolution with the tool's compression engine yields the best results.
When TinyPNG may not reach exactly 200KB
It is important to note that TinyPNG does not guarantee a specific file size for every upload. Highly detailed photographs or complex graphics may stay above the limit even after optimization. In these cases, manual resizing is the most effective way to reach your goal.
| File Format | Compression Type | Best Use Case |
|---|---|---|
| JPEG | Lossy | Photographs |
| PNG | Lossless/Lossy | Transparent Graphics |
| WebP | Advanced | Modern Web Pages |
Resize Photos to 200KB with iLoveIMG
When preparing a form photo, iLoveIMG offers a user-friendly interface to get the job done quickly. This platform is a popular choice for those who need to resize photo online without installing complex software on their computers.
Open the Resize Image tool and upload a photo
To begin, navigate to the official website and select the "Resize Image" tool from the main menu. You can easily drag and drop your files directly into the browser window or click the button to select them from your local storage.
Resize by pixels or percentage
iLoveIMG allows you to adjust your images using two distinct methods. You can choose to resize by specific pixel dimensions or by a percentage of the original size.
Using pixel-based resizing is often more predictable when a website has strict dimension requirements. Percentage-based resizing is better if you simply want to scale the image down while maintaining its original aspect ratio.
| Method | Best Use Case | Precision Level |
|---|---|---|
| Pixel-based | Specific form requirements | High |
| Percentage | General scaling | Medium |
| Compression | Final file size reduction | High |
Use the compression tool after reducing dimensions
Once you have adjusted the dimensions, you might still find the file size is above your target. You should then use the dedicated compression tool provided by iLoveIMG to further shrink the file.
Applying compression as a second step ensures that you maintain the best possible visual quality. This workflow helps you hit that 200KB limit without sacrificing clarity.
Download the result and rename it clearly
After the process finishes, download your file to your device. It is a good practice to rename the file with a clear extension, such as .jpg or .png, to keep your folders organized.
Best settings for photos used in online forms
When preparing a form photo, keep the subject centered and ensure there is enough light on the face. You should always check the final image at a normal viewing size to confirm that all identification details remain sharp and legible.
Use Adobe Express to Reduce Image Size Online
Adobe Express stands out as a versatile platform for those looking to quickly modify their visual content. It provides a streamlined experience for users who need to reduce image size without navigating complex professional software. Whether you are preparing a profile picture or a document, this tool offers the precision you need.
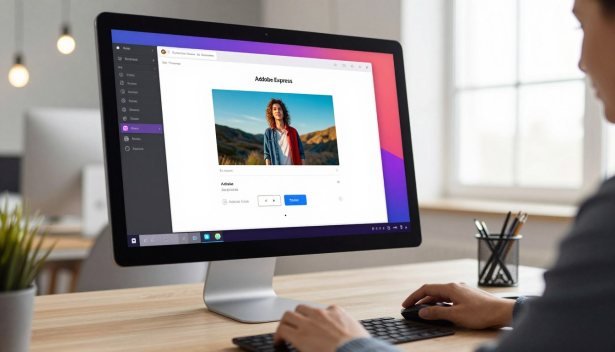
Upload a photo to Adobe Express’s free resize tool
Getting started is straightforward. Simply navigate to the website and upload your file directly into the browser-based interface. The system handles various file types, making it incredibly convenient for quick tasks.
Set suitable width and height for the intended upload
Once your file is uploaded, you can define the exact dimensions required by your destination platform. Entering specific pixel values ensures your image fits perfectly within the target application. Consistency is key when you are aiming for a specific file size limit.
Choose an export format and quality level
Selecting the right format is essential for maintaining visual integrity. Use JPEG for standard photographs to keep the file size manageable, or choose PNG if your image requires transparency or sharp graphic edges. Adjusting the quality slider allows you to hit that 200KB target while keeping the image looking crisp.
Review the image before downloading
Always take a moment to inspect the preview window before finalizing your download. This step helps you confirm that the visual quality remains high despite the compression. If the file is still too large, you can easily go back and adjust the settings again.
When Adobe Express is useful for basic edits and resizing
Adobe Express is perfect for users who need to perform simple cropping or basic visual adjustments alongside their resizing tasks. It is not designed for heavy, byte-level optimization, but it excels at making your photos ready for web uploads in just a few clicks.
Resize and Compress Images to 200KB with Compress JPEG
Many users find that Compress JPEG offers the perfect balance of speed and control for their images. This online photo compressor is designed to handle your files quickly while ensuring they meet specific size requirements for government portals or job applications in India.
Upload one or more JPEG images
The platform allows you to process multiple files at once, which saves significant time. Simply drag and drop your photos into the browser window to begin the process. The system will immediately start analyzing your files to prepare them for optimization.
Adjust compression strength with the quality slider
You can use the quality slider to find the sweet spot for your specific needs. Moving the slider to the left will compress JPEG files more aggressively, which lowers the file size rapidly. Be careful, as high levels of compression can create visible blockiness around text, faces, and high-contrast edges.
Reduce dimensions if the file remains over 200KB
Sometimes, compression alone is not enough to reach the 200KB limit without losing too much detail. If your file is still too large, it is often more effective to reduce the image dimensions. By shrinking the width and height, you maintain better visual clarity than you would by applying extreme compression settings.
Download the optimized image and confirm its size
Once you are satisfied with the preview, download your file to your device. Always check the file properties to confirm it is under 200KB before you attempt to upload it to a form. Taking this extra step ensures your submission is successful on the first try.
| Setting | File Size Impact | Visual Quality | Best Use Case |
|---|---|---|---|
| High Quality | Minimal Reduction | Excellent | Professional Prints |
| Medium Quality | Moderate Reduction | Good | Web Uploads |
| Low Quality | Maximum Reduction | Fair | Strict 200KB Limits |
Choose the Right Image Format for a 200KB Limit
Choosing the correct format is often the easiest way to reduce file size without losing quality. Before you start adjusting dimensions, consider which file type best suits your specific image content. Making the right choice early can save you significant time and effort.
When JPEG is best for photographs
The JPEG image format is the industry standard for high-quality photographs. It uses lossy compression, which effectively discards data that the human eye is unlikely to notice. This makes it perfect for complex images with many colors and gradients, helping you stay under that 200KB limit easily.
When PNG is necessary for transparency and sharp graphics
If your image requires PNG transparency, you must stick with the PNG format. This format is also superior for images containing text, logos, or sharp lines. Because it uses lossless compression, it keeps every pixel crisp, though this often results in larger file sizes compared to other formats.
When WebP can provide a smaller file
Modern WebP image compression offers a fantastic middle ground for web users. It provides high-quality results while maintaining a much smaller footprint than traditional formats. Many developers prefer it because it balances visual fidelity with efficient storage, making it a top choice for web-based applications.
Why converting a PNG photo to JPEG can save space
If you have a photograph saved as a PNG, you are likely wasting storage space. Converting a photographic PNG to a JPEG image can drastically reduce the file weight without a noticeable drop in quality. Always remember that this conversion is only suitable for photos, as it will destroy the transparency layer found in PNG files.
Check whether the destination website accepts WebP
While WebP image compression is widely supported, some older government portals or specific application forms in India may not recognize it. Always verify the accepted file types on the upload page before you begin. If the site does not list WebP, stick to JPEG or PNG to ensure your file is accepted on the first try.
Adjust Image Dimensions Before Lowering Quality
Managing file size effectively often starts with resizing your image dimensions rather than just lowering quality. When you start with a massive high-resolution file, heavy compression can lead to blurry artifacts and loss of detail. By reducing the pixel count first, you create a cleaner foundation for your file.
Choose practical dimensions for profile photos and documents
Most online portals do not require massive, high-definition files. For a standard form photo, a smaller size is usually sufficient and easier to manage. Selecting practical dimensions ensures your file stays under the 200KB limit without sacrificing clarity.
Resize while preserving the original aspect ratio
It is vital to maintain the correct aspect ratio during the resizing process. If you ignore this, your subject may appear stretched or squashed, which looks unprofessional. Most modern tools allow you to lock the ratio automatically to keep your images looking natural.
Crop unnecessary background areas before compression
Often, a large portion of a photo consists of empty space that adds unnecessary weight to the file. Cropping these background areas removes pixels that do not contribute useful information. This simple step helps you reach your target size while keeping the main subject sharp and clear.
Use pixels instead of percentage when a website has specific requirements
When a portal asks for a specific form photo size, always use exact pixel settings. Resizing by percentage can lead to unpredictable final measurements that might get rejected by the system. Setting exact image dimensions ensures your file meets the technical criteria perfectly.
Suggested starting dimensions for common online uploads
To help you get started, consider these common pixel settings for various types of digital uploads. These dimensions provide a great balance between visual quality and file size efficiency.
| Upload Type | Width (px) | Height (px) |
|---|---|---|
| Profile Picture | 600 | 600 |
| Identity Document | 800 | 1000 |
| General Form | 1000 | 1200 |
| Signature Scan | 1200 | 600 |
How to Reach 200KB Without Making the Image Blurry
Achieving a 200KB file size does not have to mean sacrificing the visual integrity of your images. By following a gradual workflow, you can maintain excellent image quality while meeting strict upload requirements for your documents or web projects.
Reduce dimensions gradually instead of making one drastic change
Start by resizing the longest side of your photo in small, incremental steps. Instead of forcing a massive reduction at once, test the file size after each minor adjustment. This method helps you find the sweet spot where the file is small enough without losing necessary detail.
Lower quality in small increments
Once the dimensions are set, you can begin to lower the quality settings. Adjust the slider in small percentages rather than jumping to the lowest setting immediately. This careful approach ensures that you stay under the 200KB limit while keeping the image quality high enough for professional use.
Inspect text, faces, edges, and fine details at normal viewing size
Always view your image at its intended display size rather than zooming in too far. Zooming can make minor imperfections look worse than they actually are, leading to unnecessary over-editing. Focus on how the text, facial features, and borders appear to the average viewer.
"Quality is never an accident; it is always the result of high intention, sincere effort, intelligent direction and skillful execution."
Remove metadata when the tool provides that option
Many image files contain hidden data, such as camera settings or location information, which adds to the total file size. Selecting the option to strip metadata is a simple way to save space without affecting the visual appearance of your photo at all.
Recognize compression artifacts and excessive sharpening
If you push the compression too far, you may notice compression artifacts appearing in your file. Look for blocky patterns, halos around objects, or unnatural ringing near sharp edges. Additionally, avoid excessive sharpening, as this can create a harsh, digital look that distracts from the original content.
Verify the Final File Before Uploading It
Successfully resizing your photo is only half the battle; the final step is confirming the file meets all technical upload requirements. Taking a moment to double-check your file properties can save you from frustrating errors when submitting documents or profile pictures.
Check the file size on Windows, macOS, Android, and iPhone
On Windows, right-click your file and select "Properties" to view the exact size in kilobytes. Mac users can simply select the file and press "Command + I" to open the "Get Info" window.
If you are using an Android device, open your "Files" app, long-press the image, and tap the three-dot menu to select "Details." iPhone users can check the file size by opening the image in the "Files" app, tapping the "Share" icon, and selecting "Get Info" or by using a third-party photo metadata viewer.
Confirm that the file is below rather than exactly 200KB
It is a common mistake to aim for exactly 200KB. However, a website may reject a file that appears to be exactly 200KB if its byte count slightly exceeds the portal’s internal maximum.
Always aim for a file size that is comfortably under the limit, such as 190KB or 195KB. This buffer ensures that your image file size remains within the acceptable range for the server.
Open the downloaded image to check for corruption
Before you attempt to upload, always open the file in your default image viewer. If the image fails to load or displays strange artifacts, the file may have become corrupted during the compression process.
A quick visual inspection helps you verify image quality and ensures that the file is not broken. If the image looks blurry or distorted, you may need to re-export it with slightly higher quality settings.
Verify the file extension, dimensions, and orientation
Check that your file ends in a standard extension like .jpg or .png. Additionally, ensure the dimensions match the portal's requirements, as some systems automatically reject images that are too large or too small.
Finally, confirm that the orientation has not changed during the export. Sometimes, tools may rotate an image automatically, which can be problematic for official documents.
Why a website may reject an image that appears to be the right size
Even if your image file size looks correct, hidden metadata or specific server rules can cause a rejection. Websites often have strict upload requirements regarding color profiles or specific file headers that standard tools might alter.
| Rejection Cause | Description | Fix |
|---|---|---|
| Unsupported Format | File is not a standard JPEG or PNG. | Convert to a supported format. |
| Incorrect Dimensions | Image is too wide or too tall. | Resize to specific pixel limits. |
| Corrupted Data | File header is damaged. | Re-download or re-save the file. |
| Filename Issues | Contains special characters. | Rename using only letters and numbers. |
Privacy and Safety Tips for Free Online Image Resizers
Keeping your personal information safe while using online image tools is a smart habit to develop. While these platforms make resizing files easy, you must remain vigilant about what you upload. Protecting your image privacy ensures that your data does not end up in the wrong hands.
Avoid uploading sensitive identity documents to unknown websites
Never upload passports, government IDs, or financial statements to unfamiliar websites. These documents contain highly sensitive data that could lead to identity theft if intercepted. If you must resize such files, consider using offline software installed directly on your computer instead.
Review privacy policies and automatic deletion claims
Before you process any file, take a moment to read the site's privacy policy. Look for clear statements regarding how long they store your uploads. Reliable services typically promise automatic deletion of files from their servers shortly after the download is complete.
Use reputable tools such as Squoosh, TinyPNG, iLoveIMG, and Adobe Express
Stick to well-known platforms that have established reputations in the industry. Tools like Squoosh, TinyPNG, iLoveIMG, and Adobe Express are generally safer choices for your daily tasks. Even with these trusted online image tools, always use the least sensitive version of an image whenever possible.
Delete downloaded files from shared devices when necessary
If you are working from a public computer or a shared device, your security does not end with the upload. Always remember to delete the processed file from the "Downloads" folder after you finish. Clearing your browser history and temporary cache is also a crucial step to maintain your overall privacy.
Conclusion
Achieving the perfect file size for your digital applications is a straightforward process when you follow a consistent workflow. You can successfully resize image to 200kb by selecting the ideal format, adjusting dimensions, and applying compression in small, controlled steps.
Remember that JPEG remains the top choice for photographs, while PNG serves best when you need to preserve transparency. WebP often provides a smaller file size when your destination platform supports this modern format. Always keep a backup of your original file before you begin any edits.
Take a moment to compare your final output against the original to ensure quality remains high. Verifying the file size on your device before you submit it prevents errors during the upload process. Aiming for a file slightly below 200KB is a smart strategy to ensure you meet strict requirements without any technical issues.
Check the specific size and format rules for your target website to avoid rejection. With these reliable tools and techniques, you can resize image to 200kb with confidence every time you prepare a document or profile photo.